Cyberdeck part 1
Edit 2023-03-DD: Added build log
Cyberdeck build log
-
Part 1: the beginning
[Edit ends.]
It’s been a while since the last post, but I though I’ll start to share some kind of build log from one of my current project: Cyberdeck.
Ever since I saw that my friend Heikki showed me his cyberdeck in the late summer of 2020, I immediately wanted to build one too. Not that I had any real world use for it, but it sounded really nice project where I can learn 3D design.
What is cyberdeck?
Cyberdecks are basically portable, chunky computers that takes inspiration from cyberpunk. Check these examples from Zack Freeman and Jay Doscher
Plan
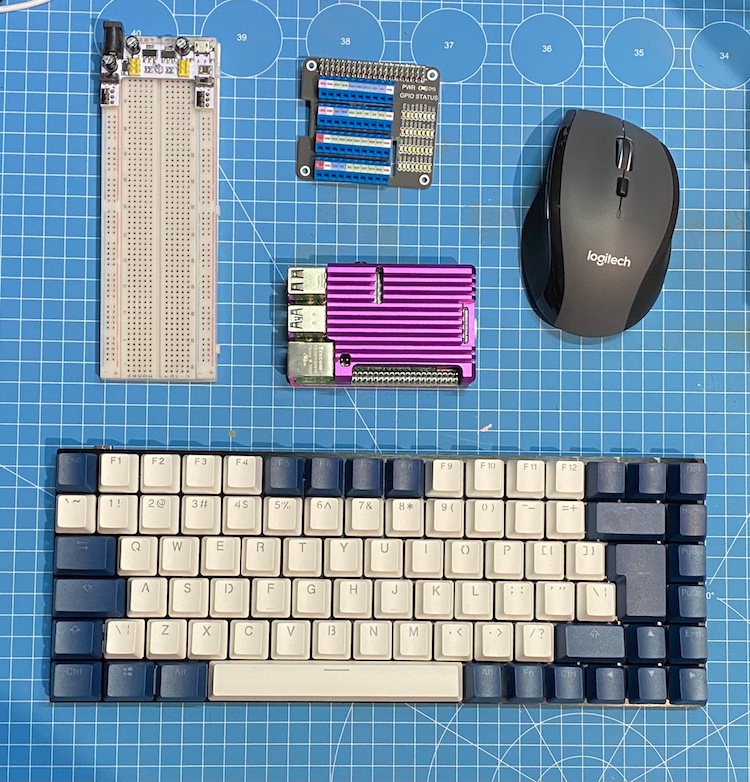
The plan is to have a mobile station for electronics work. Therefore I went with the following component list:
- Raspberry Pi 4 (4GB)
- Breadboard
- GPIO extender
- 12,5” 1080p screen
- SSD for storage
- Mechanical keyboard
-
Wireless mouse
 Few parts of the project
Parts
This table will contain list of used materials/parts as those are taken in use in the project. It will be updated during the project.
| Part | Amount | For what |
|---|---|---|
| PLA | - | 3D printer parts needs to be printed |
| Case, 34x29x15cm | 1pc | To hold all the tech and parts |
| Heat insert M3 6mm long | ~48pcs | For bottom rails’ holes and speaker mounts |
| Heat insert M3 3mm long | ~40pcs | For lid rails’ holes |
| Screw M3 6mm long | ~31pcs | For attaching components in part 2 |
| Nut M3 | ~3pcs | For attaching control board to it’s mount |
| 12.5” FHD IPS | 1pc | Screen that was meant for Thinkpad X240 / X250/X260/X270 |
| Driver board kit | 1pc | For controlling the screen and getting HDMI out |
| 2.0 speakers | 1pc | The cheapest speakers I found from the store |
Note: The amounts for heat inserts, nuts and screws are estimates at it’s best, can’t remember all used ones. I might do a proper counting once the whole project is more or less done.
Case
I went with Clas Ohlson’s 34x29x15cm case. At first I was going to make the project to a smaller case that I had a spare one, but after calculations it proved to be too small for 12,5” Thinkpad screen. Earlier plans included 10” non-FullHD screen.
Design
The first step was to create a close copy of the case in Fusion360. I made only a quick mockup of the case, just to help with visualizing the project and plans.
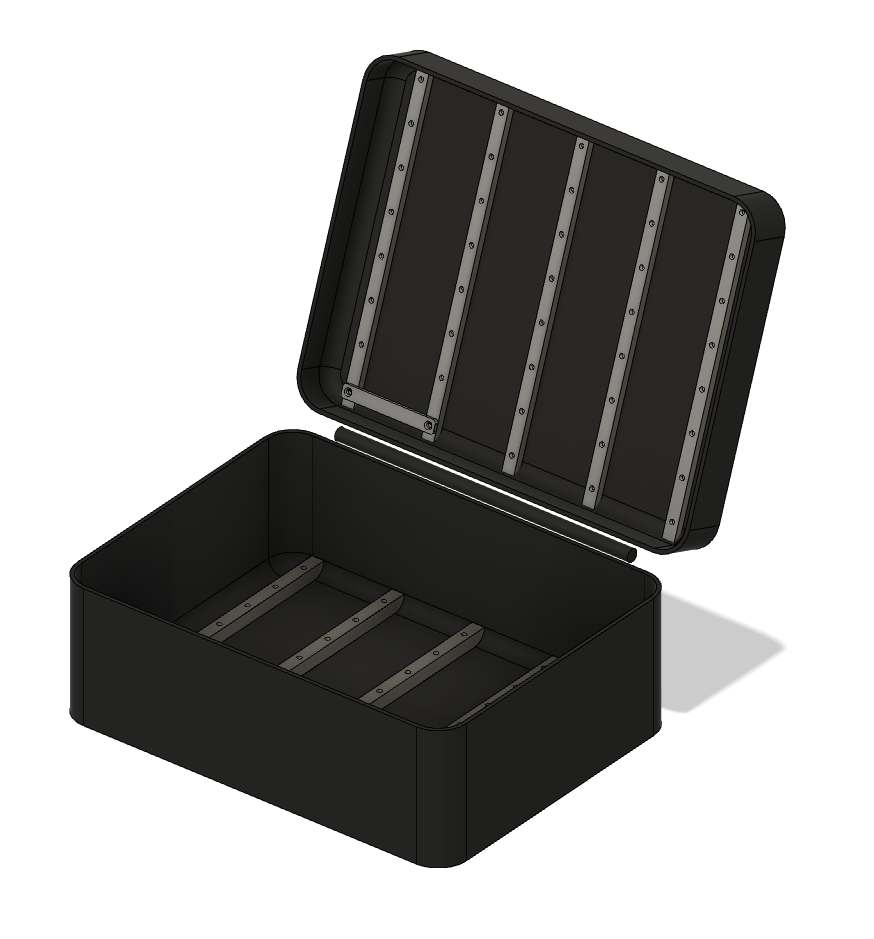
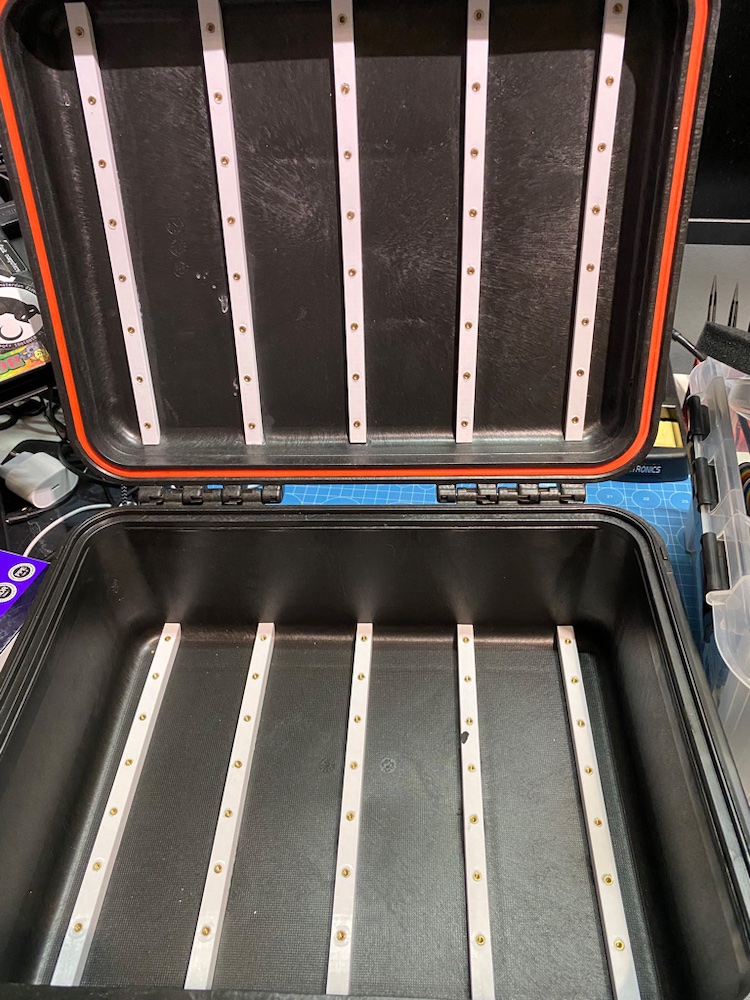
The first problem was how to attach all the interior tech inside the case. I wanted something modular so I can later add, change or remove some parts. I came up with an idea of adding rails/bars in the lid and bottom of the case. Rails have holes for heat inserts, so I can attach my modules with screws.
Here is a pic of the rails and bars before gluing
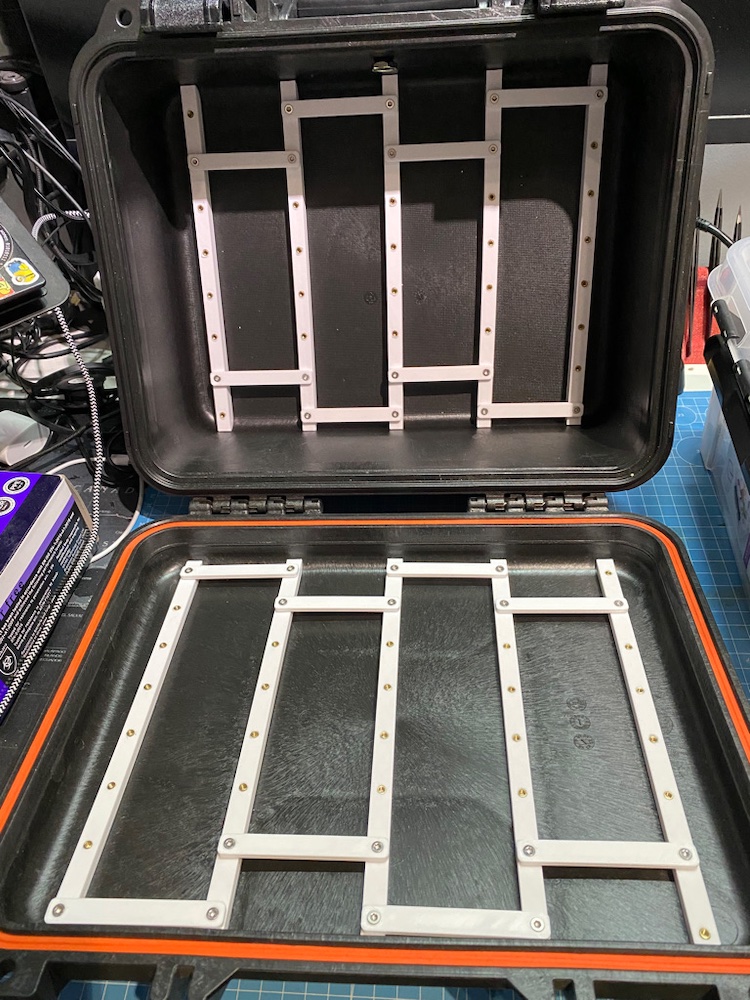 Vertical bars between the rails are only to help align horizontal rails straight when gluing them.
I glued the rails in one take with instant glue. I wasn’t happy with the result, since using instant glue, you have to be quite fast to get everything in place before glue dries. I decided to change tactics with bottom case’s rails.
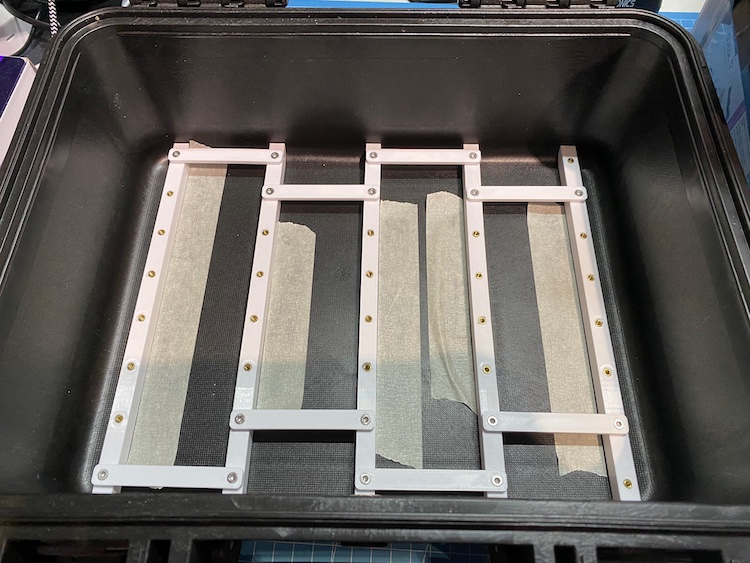
By using the tape, I didn’t have such a hurry to get all rails glued and then placing them exactly where they should go.
After glue was dryed long enough, I removed the vertical bars from the lid. And in the end, both ways (all in one go and one rail at the time) worked good enough-
 That one black thing in the second bar from right is a pice of a glove that I manage to glue in to the rail..
Now starts the hard part: I need to start designing and thinking how I place all the parts in there.
Shoutout to another Heikki for proofreading the post and giving some tips!